

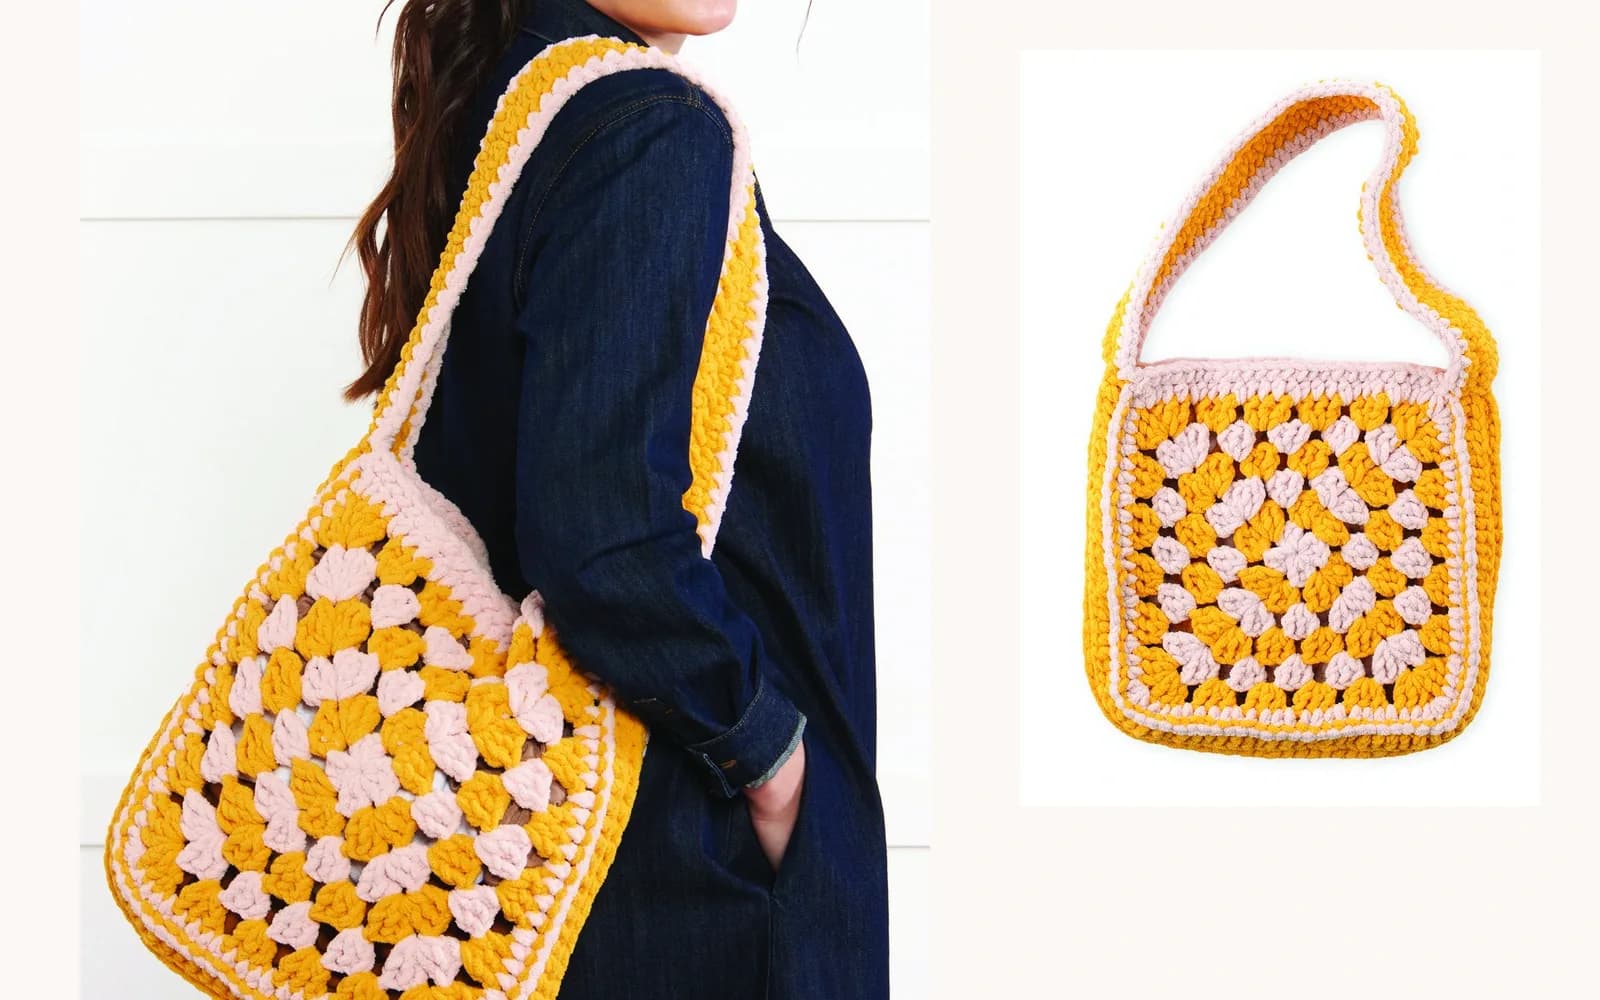
Crochet Granny Tote Pattern
This crochet granny tote pattern turns two oversized granny motifs into a soft, roomy shoulder bag with a coordinated side treatment and a wide crocheted handle. The original design uses two Bernat Blanket colors - Pink Dust and Sunsoaked - for a warm pastel-and-gold look.
About This Pattern
The bag is built from two matching granny motifs. Each motif grows through six granny-style rounds, followed by a half-double-crochet edging. A back-post side row adds structure along the sides and bottom, then the two pieces are joined with a flat slip-stitch seam. The handle is crocheted separately, sewn to the back, and finished with a contrasting edging.
Skill Level
Beginner.
Finished Size
Approximately 12 in [30.5 cm] square, excluding the handle.
Materials
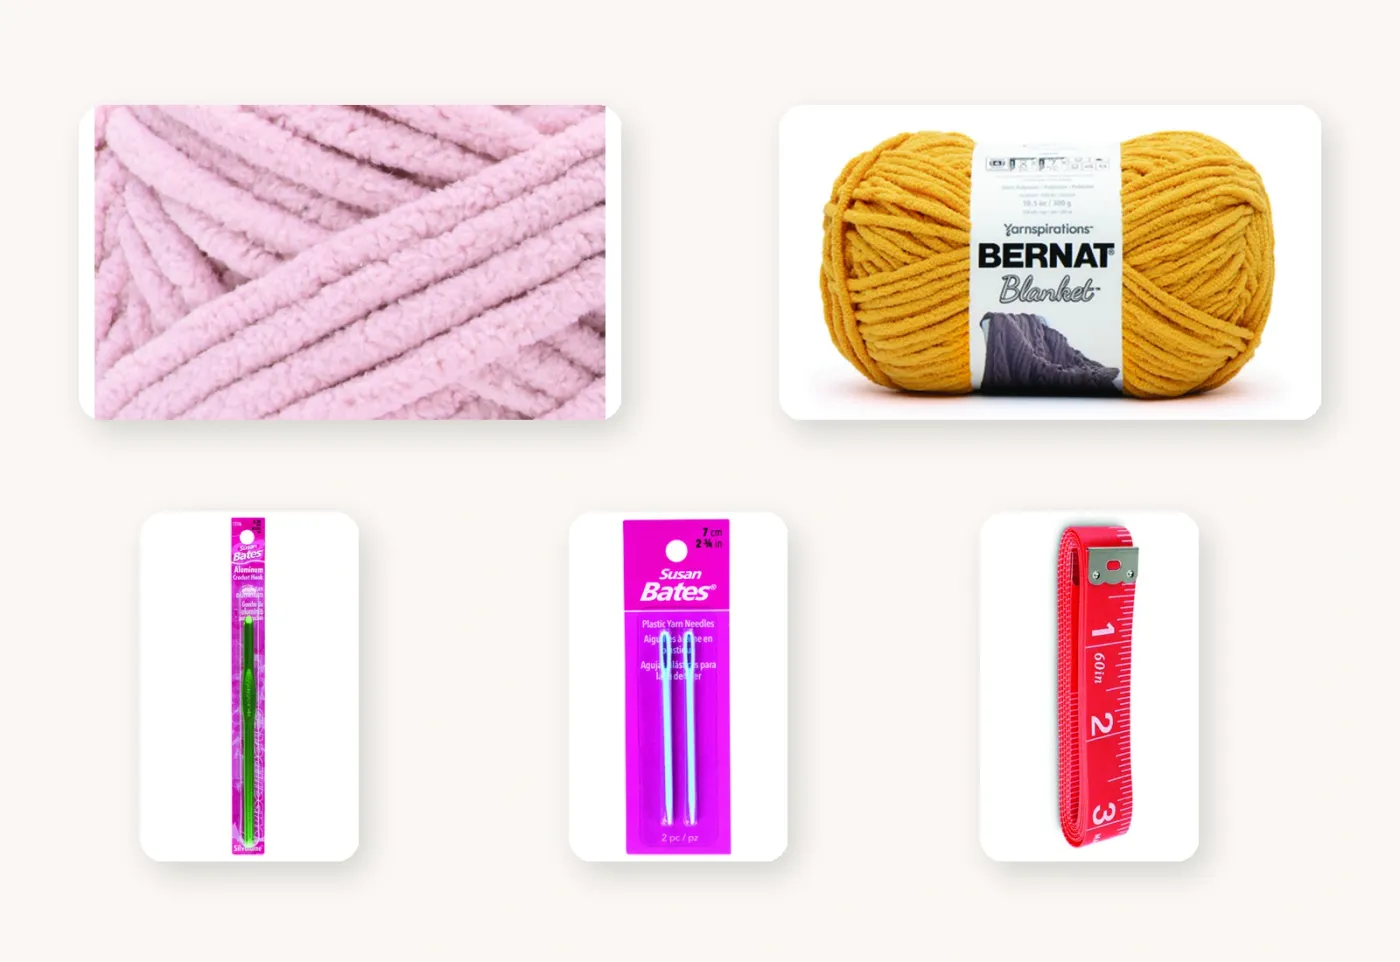
- Bernat Blanket yarn
- Contrast A - Pink Dust (10956): 1 ball or 110 yds / 100 m
- Contrast B - Sunsoaked (10918): 1 ball or 150 yds / 137 m
- US K/10½ (6.5 mm) crochet hook, or size needed to obtain gauge
- Yarn needle
- Tape measure
Gauge
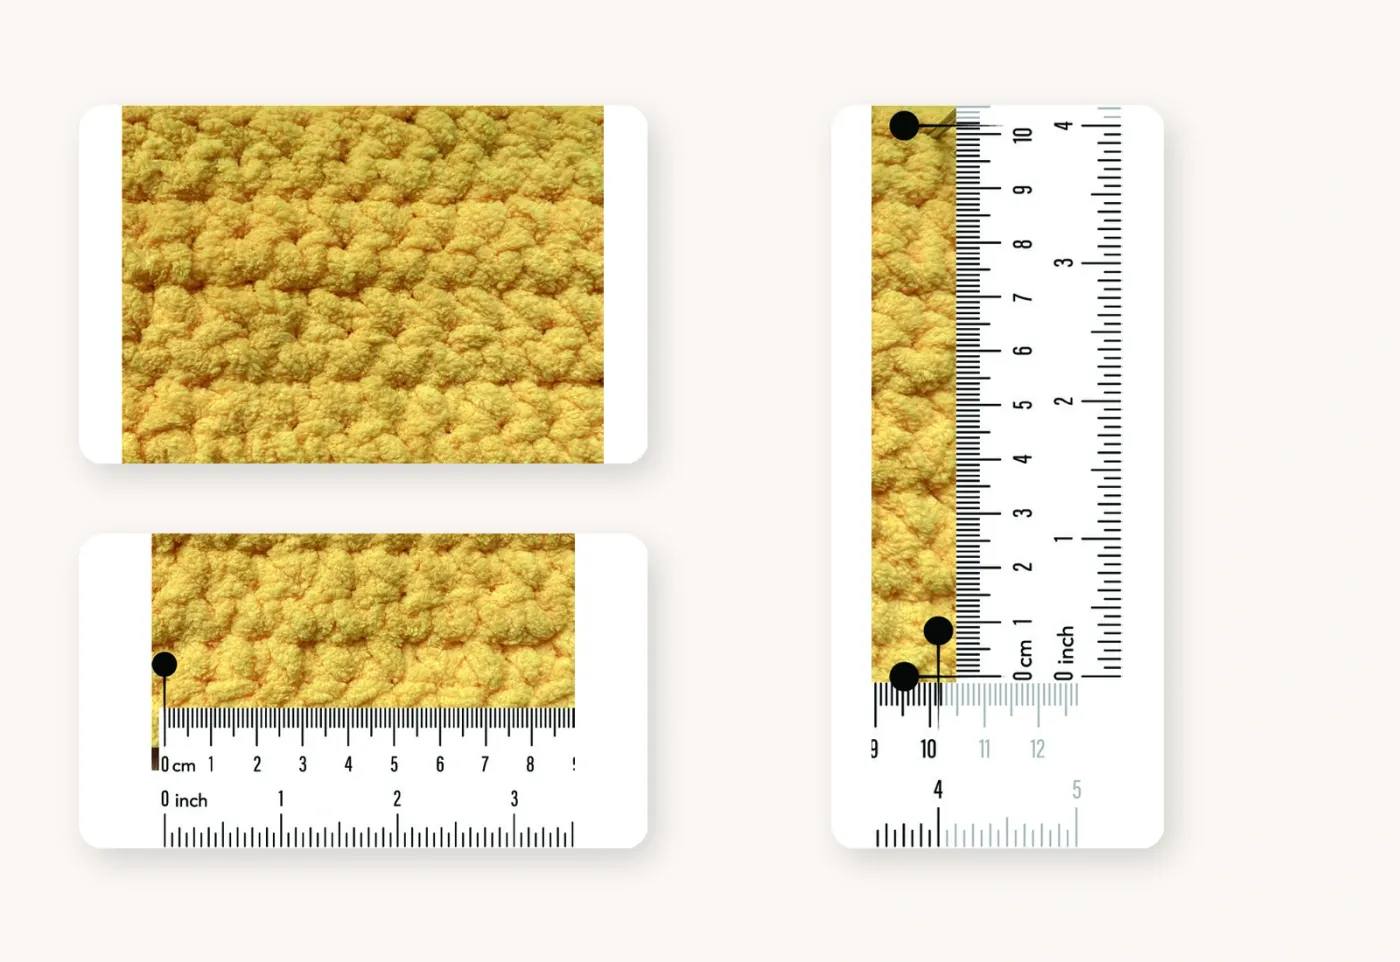
10 sc and 12 rows = 4 in [10 cm].
Abbreviations
- Beg = Beginning
- Ch = Chain(s)
- Dc = Double crochet
- Hdc = Half double crochet
- Rem = Remaining
- Rep = Repeat
- Rnd(s) = Round(s)
- RS = Right side
- Sc = Single crochet
- Sl st = Slip stitch
- Sp(s) = Space(s)
- St(s) = Stitch(es)
- Tog = Together
- WS = Wrong side
- Yoh = Yarn over hook
- Dcbp = Double crochet back post
Special Stitch
Double Crochet Back Post - dcbp
Yarn over and draw up a loop around the post of the next stitch at the back of the work, inserting the hook from right to left. Yarn over and draw through 2 loops on the hook twice.
Pattern Notes
- Ch 4 at the beginning of rounds counts as 1 dc and 1 ch-1 space.
- When switching colors, do not break the unused yarn at the end of the round. Carry the yarn not in use on the WS of the work.
- Make 2 identical granny motifs for the front and back.
Pattern Instructions
Front and Back Granny Motif - Make 2 Alike
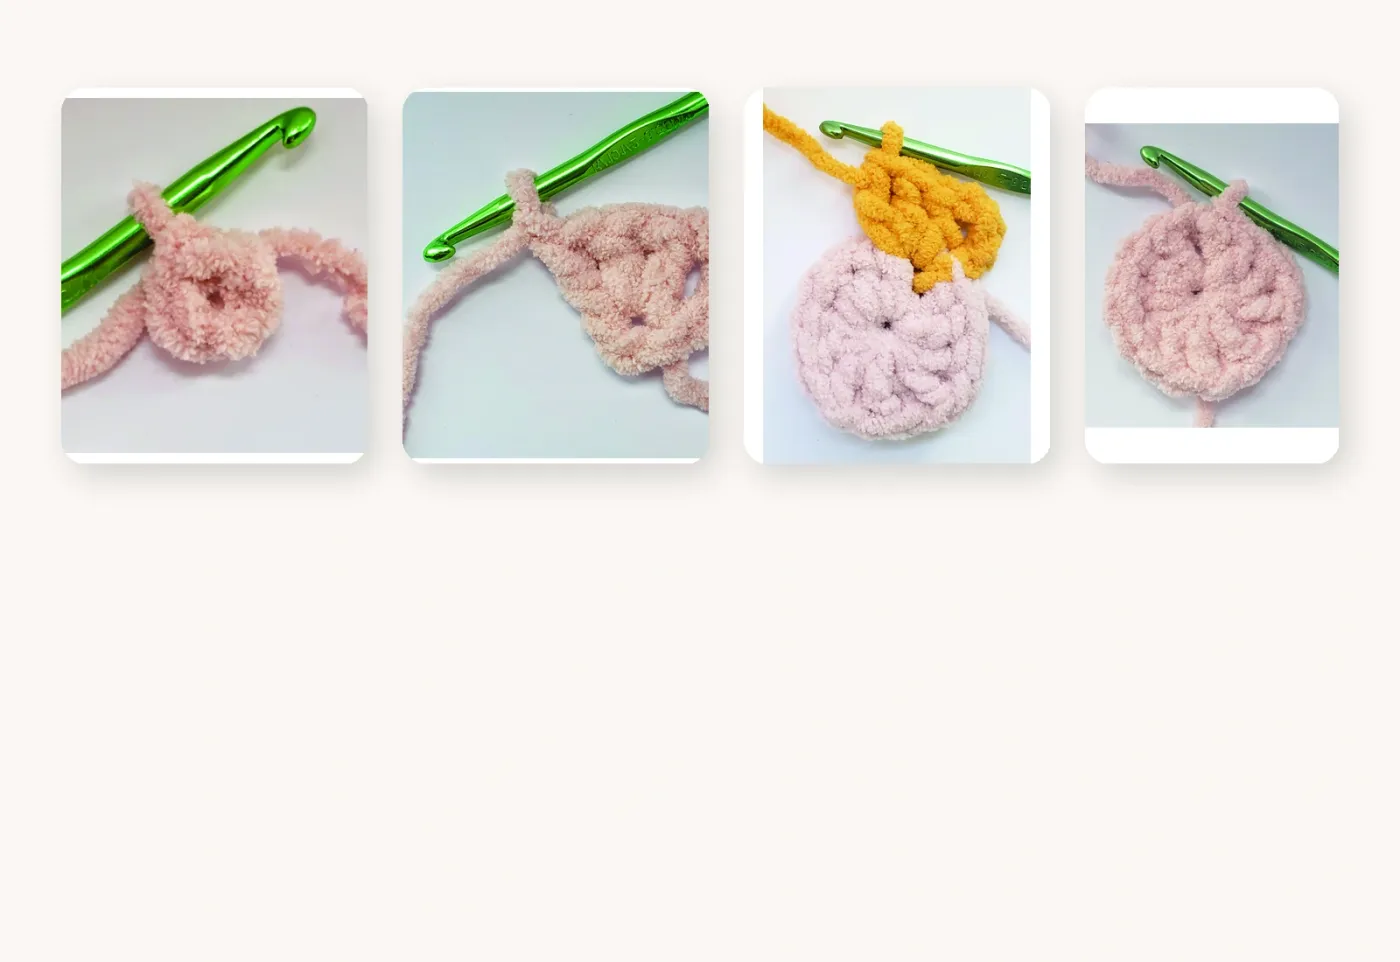
With A, ch 4. Join with sl st to form a ring.
1st Round
Ch 4. Work [3 dc, ch 1] 3 times in the ring. Work 2 dc in the ring. Join with sl st to the 3rd ch of the beginning ch 4.
2nd Round
Join B with sl st in the next corner ch-1 sp.
With B, ch 4. Work 3 dc in the same corner ch-1 sp as the sl st.
Ch 1. Work (3 dc, ch 1, 3 dc) in the next corner ch-1 sp.
Rep from * twice more.
Ch 1. Work 2 dc in the first corner ch-1 sp. Join with sl st to the 3rd ch of the beginning ch 4.
3rd Round
Join A with sl st in the next corner ch-1 sp.
With A, ch 4. Work 3 dc in the same sp as the sl st.
Ch 1. Work 3 dc in the next ch-1 sp. Ch 1. Work (3 dc, ch 1, 3 dc) in the next corner ch-1 sp.
Rep from * twice more.
Ch 1. Work 3 dc in the last ch-1 sp. Ch 1. Work 2 dc in the first ch-1 sp. Join with sl st to the 3rd ch of the beginning ch 4.
4th Round
Join B with sl st in the next corner ch-1 sp.
With B, ch 4. Work 3 dc in the same sp as the sl st.
(Ch 1. Work 3 dc in the next ch-1 sp) twice. Ch 1.* Work (3 dc, ch 1, 3 dc) in the next corner ch-1 sp.*
Rep from * twice more, then rep from * to ** once.
Work 2 dc in the first corner ch-1 sp. Join with sl st to the 3rd ch of the beginning ch 4.
5th Round
Join A with sl st in the next corner ch-1 sp.
With A, ch 4. Work 3 dc in the same sp as the sl st.
(Ch 1. Work 3 dc in the next ch-1 sp) to the next corner ch-1 sp. Ch 1.* Work (3 dc, ch 1, 3 dc) in the next corner ch-1 sp.*
Rep from * twice more, then rep from * to ** once.
Work 2 dc in the first corner ch-1 sp. Join with sl st to the 3rd ch of the beginning ch 4.
6th Round
With B, work the same as the 5th round.
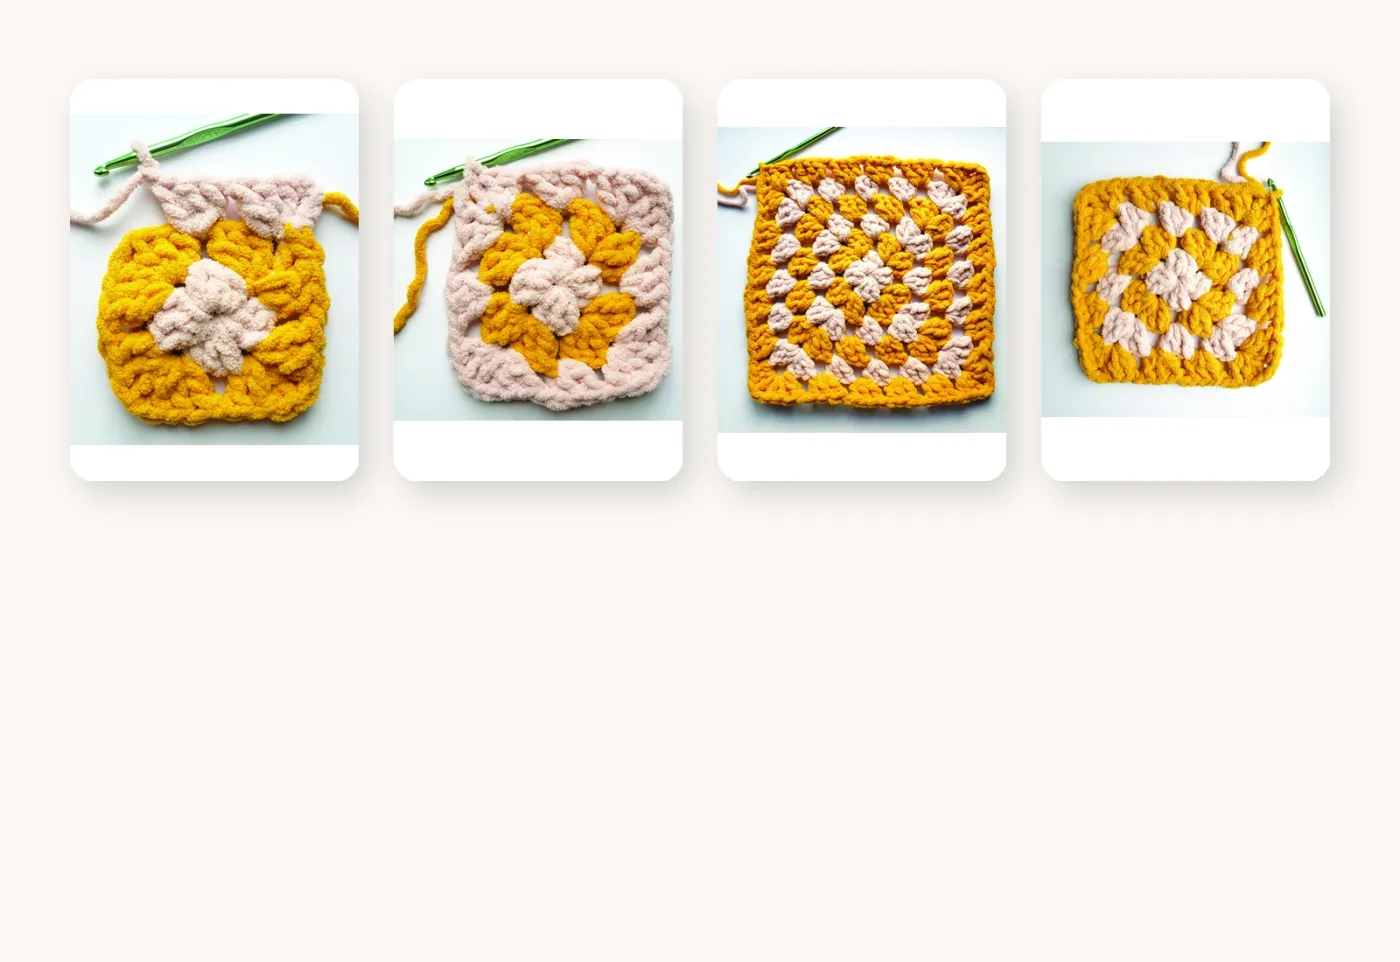
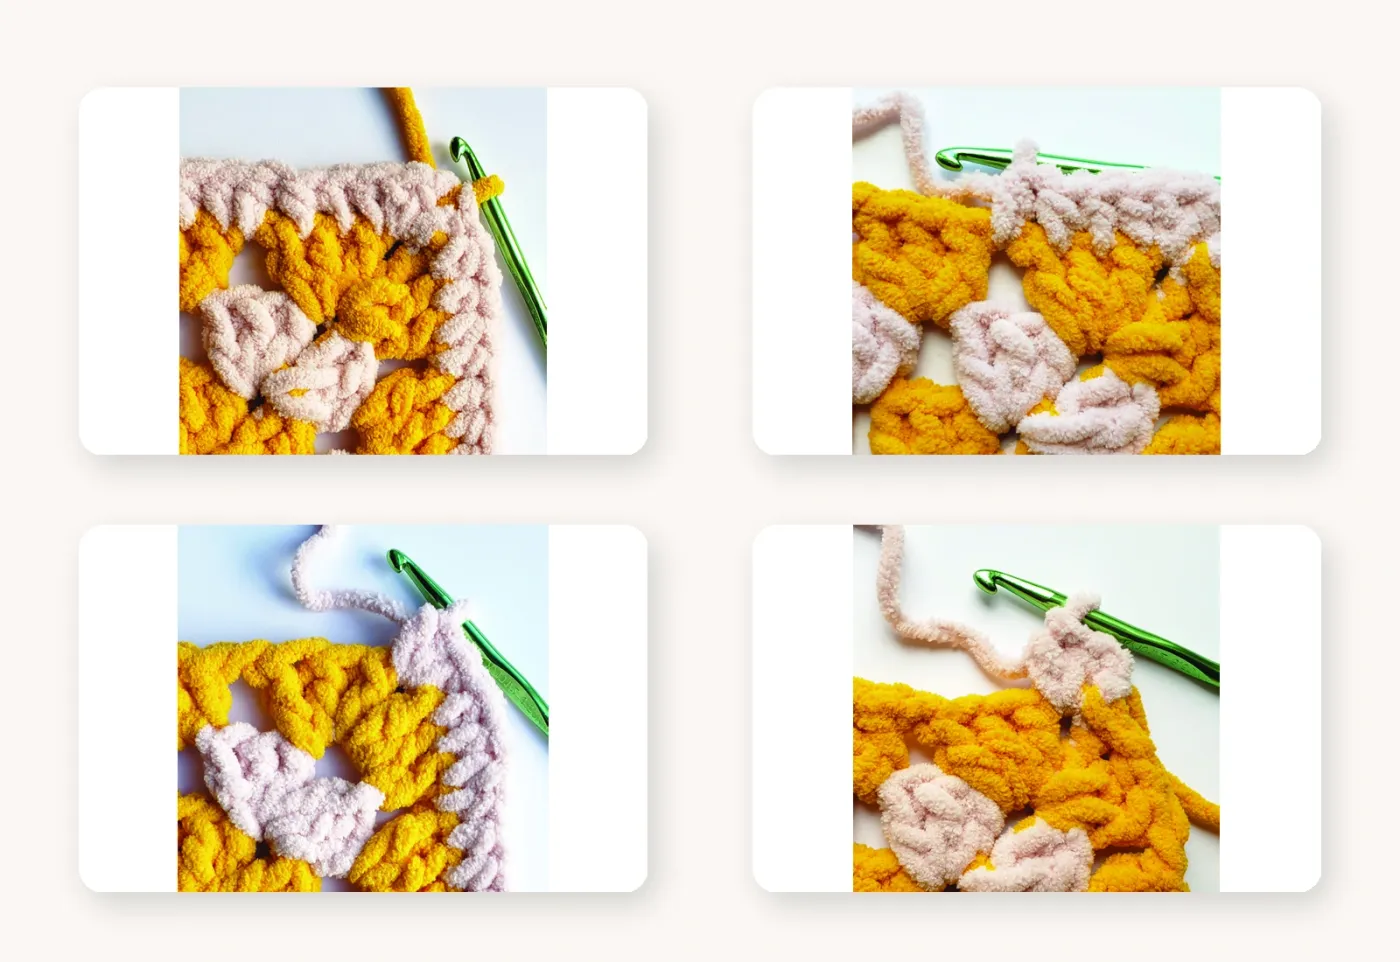
Edging - 7th Round
Join A with sl st in the next corner ch-1 sp.
With A, ch 2. The ch 2 does not count as a stitch.
Work 2 hdc in the same sp as the sl st.
Work 1 hdc in each dc and ch-1 sp to the next corner ch-1 sp.* Work 3 hdc in the corner ch-1 sp.*
Rep from * twice more, then rep from * to ** once.
Work 1 hdc in the first corner ch-1 sp. Join B with sl st to the first hdc. Break A.
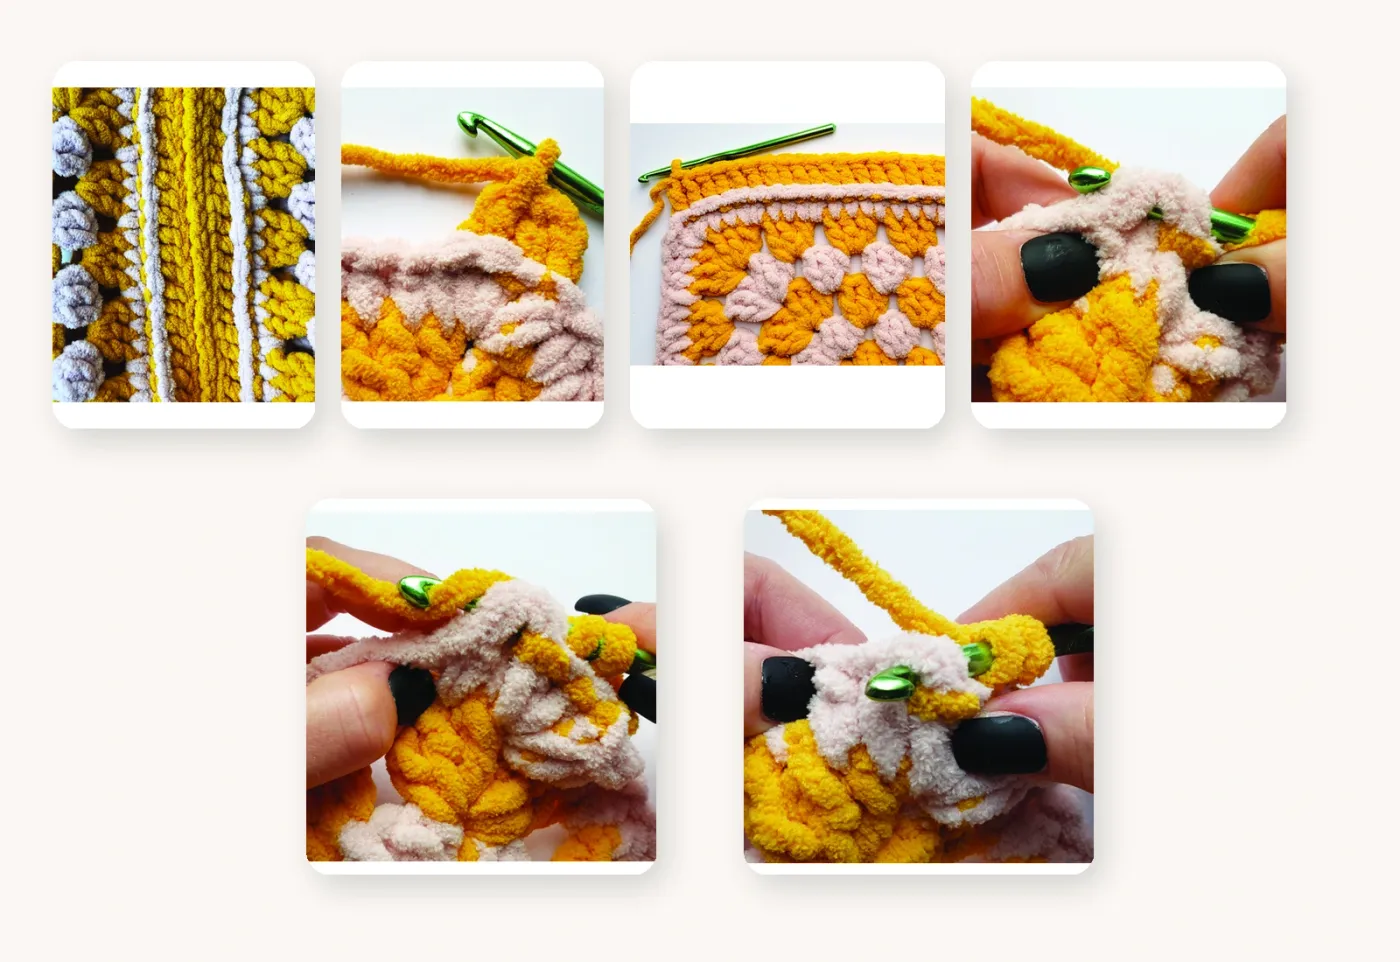
Side
With B, ch 2. The ch 2 does not count as a stitch.
Work 1 dcbp around each hdc down the left side of the motif, then 1 dcbp around each hdc along the bottom, and 1 dcbp around each hdc up the right side.
Fasten off at the top of the right side.
Join Front and Back
Place the Front and Back together with WS together.
With B, join the sides and bottom using a flat sl st join, working the sl sts through the back loops only of each dcbp to the end of the row.
Fasten off.
Handle
With B, ch 59.
1st row: Work 1 sc in the 2nd ch from the hook and 1 sc in each ch to the end of the chain. Turn. 58 sc.
2nd to 4th rows: Ch 1. Work 1 sc in each sc to the end of the row. Turn.
Fasten off at the end of the 4th row.
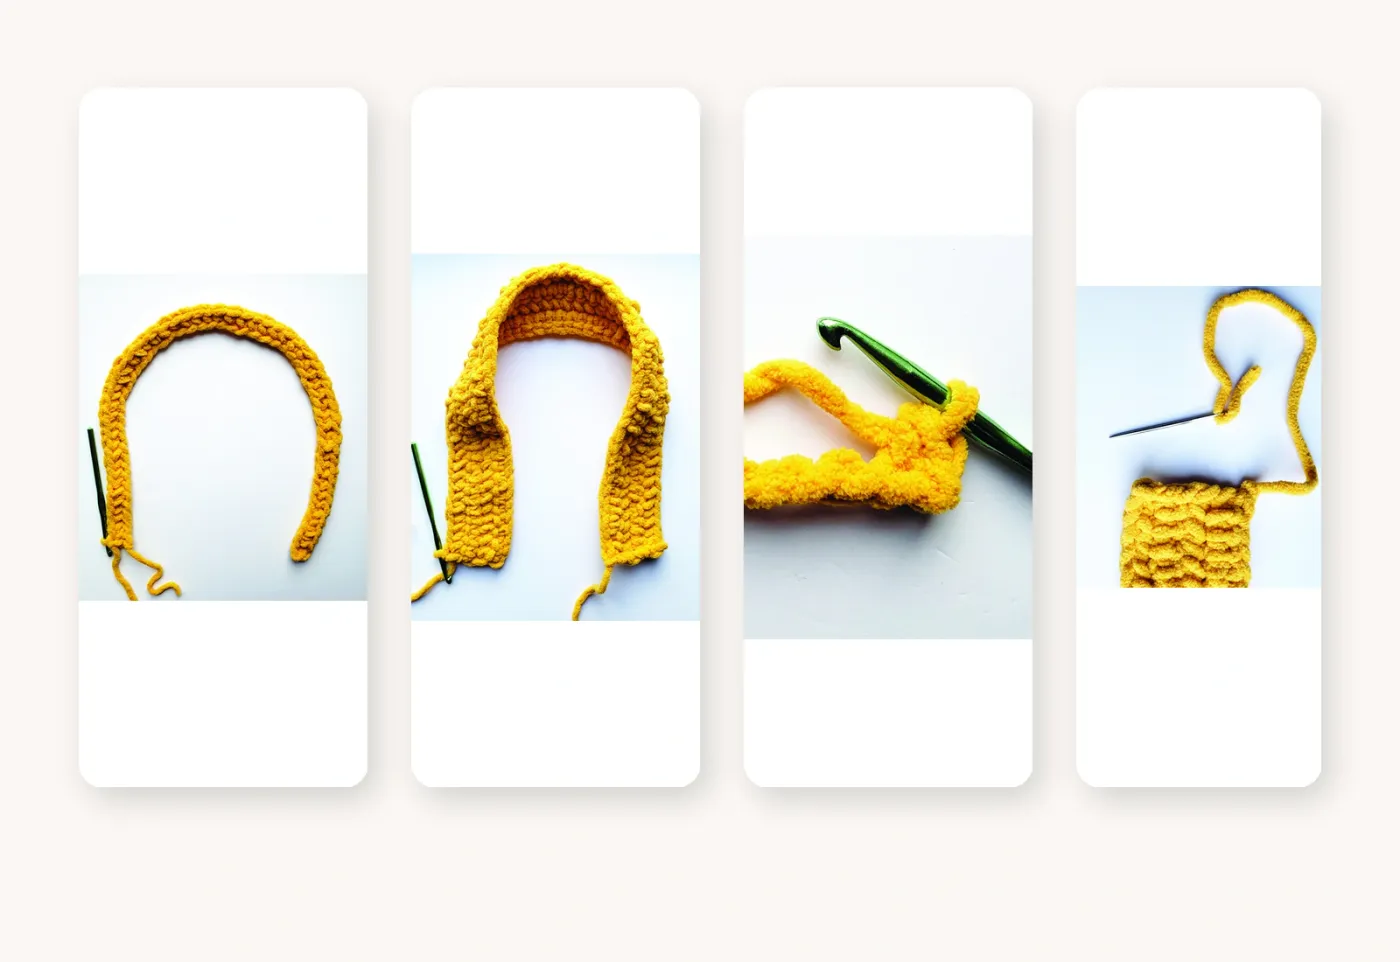
Finishing
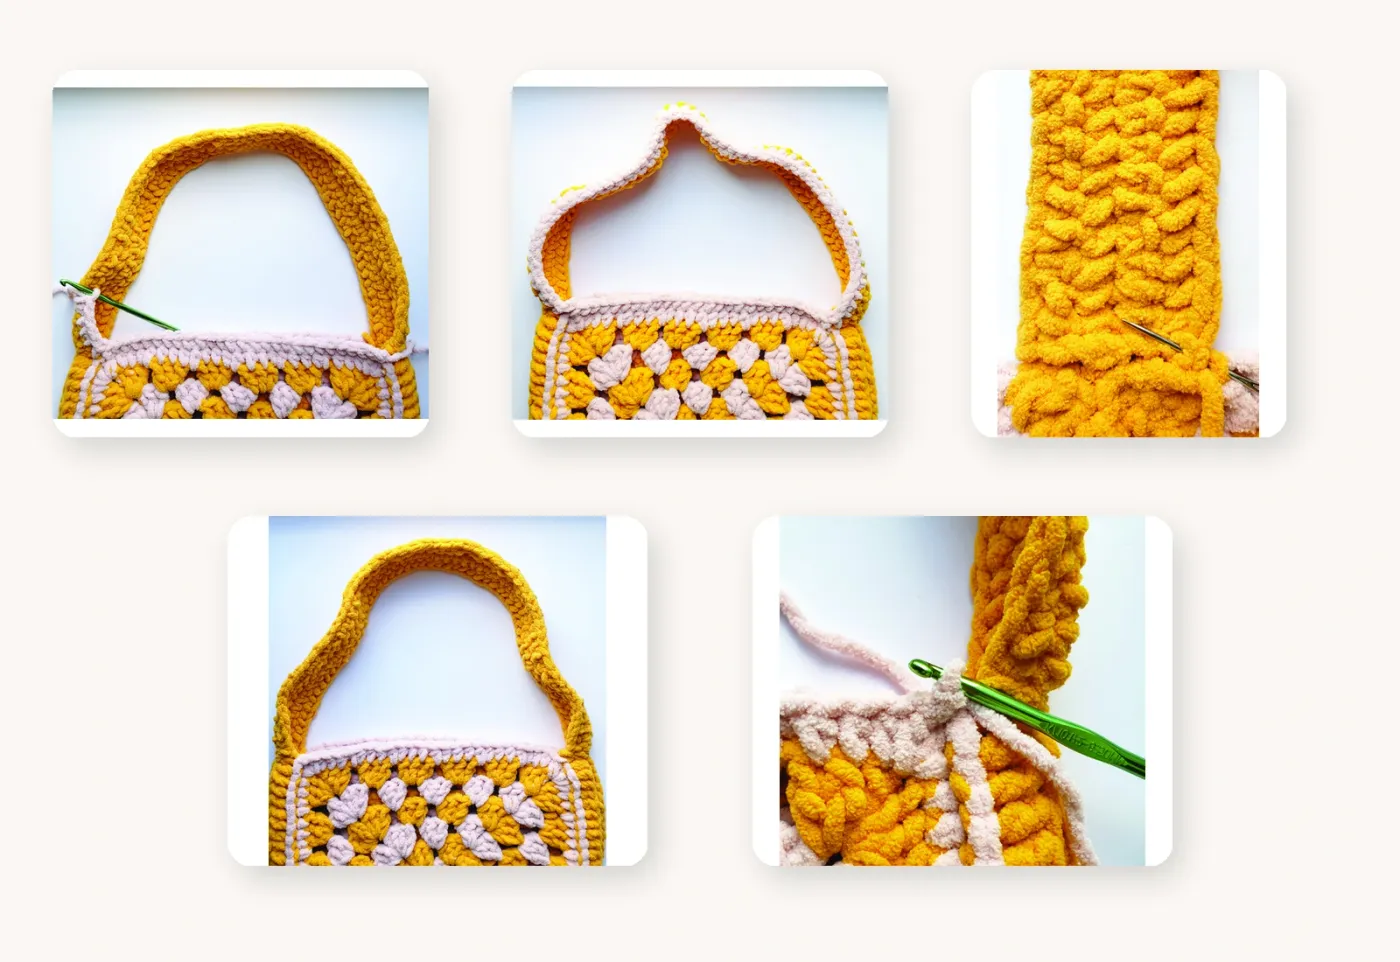
Using B and a yarn needle, sew the short ends of the Handle to the top edge of the Back at either side edge.
Top and Handle Edging
On one side, work into each sc of the Handle. On the other side, work into the remaining loop of the foundation chain.
With RS facing, join A with sl st to the first hdc at the top edge of the Bag.
Ch 1. Work 1 sc in each st across the top edge to the Handle.
Work 1 sc in each sc or remaining loop of the foundation chain along the edge of the Handle.
Join with sl st to the first sc. Fasten off.
Repeat on the other side.
Helpful Tips
- Keep the corners easy to identify by placing a stitch marker in each corner ch-1 space.
- Because the yarn is plush, count the clusters and spaces rather than relying only on visual stitch definition.
- Check the gauge before starting if you want the finished tote close to the stated 12-inch size.
- Keep unused yarn on the WS when changing colors so the front stays clean.
- Before sewing the handle permanently, make sure it is not twisted.
Troubleshooting
My granny square is curling
Check that every corner receives the full corner group and that the ch-1 spaces between groups are not being skipped.
My two motifs are different sizes
Make sure both motifs have the same number of rounds and that your tension stays consistent. The target gauge is 10 sc and 12 rows over 4 in [10 cm].
The join feels bulky
The pattern uses a flat slip-stitch join through the back loops of the dcbp stitches. Working only through those loops helps keep the seam flatter.
My handle looks twisted
Lay the bag flat before sewing the second handle end and check that both edges of the handle face the same direction.
Frequently Asked Questions
How large is the finished granny tote?
Approximately 12 in [30.5 cm] square, excluding the handle.
What hook size does the pattern use?
US K/10½ (6.5 mm), or the hook size needed to obtain gauge.
How many granny motifs do I make?
Two identical motifs - one for the front and one for the back.
Do I cut the yarn every time I change colors?
No. The source instructs you not to break the yarn at the end of the round when switching colors; keep the unused yarn on the WS.
Is this crochet granny tote beginner friendly?
Yes. The source rates the pattern as Beginner.
Final Notes
The crochet granny tote pattern uses a simple repeating granny construction, thick yarn and a flat joining method to create a soft statement bag. Once you understand the corner repeat, the same structure carries through the remaining motif rounds before you add the sides, handle and final edging.