
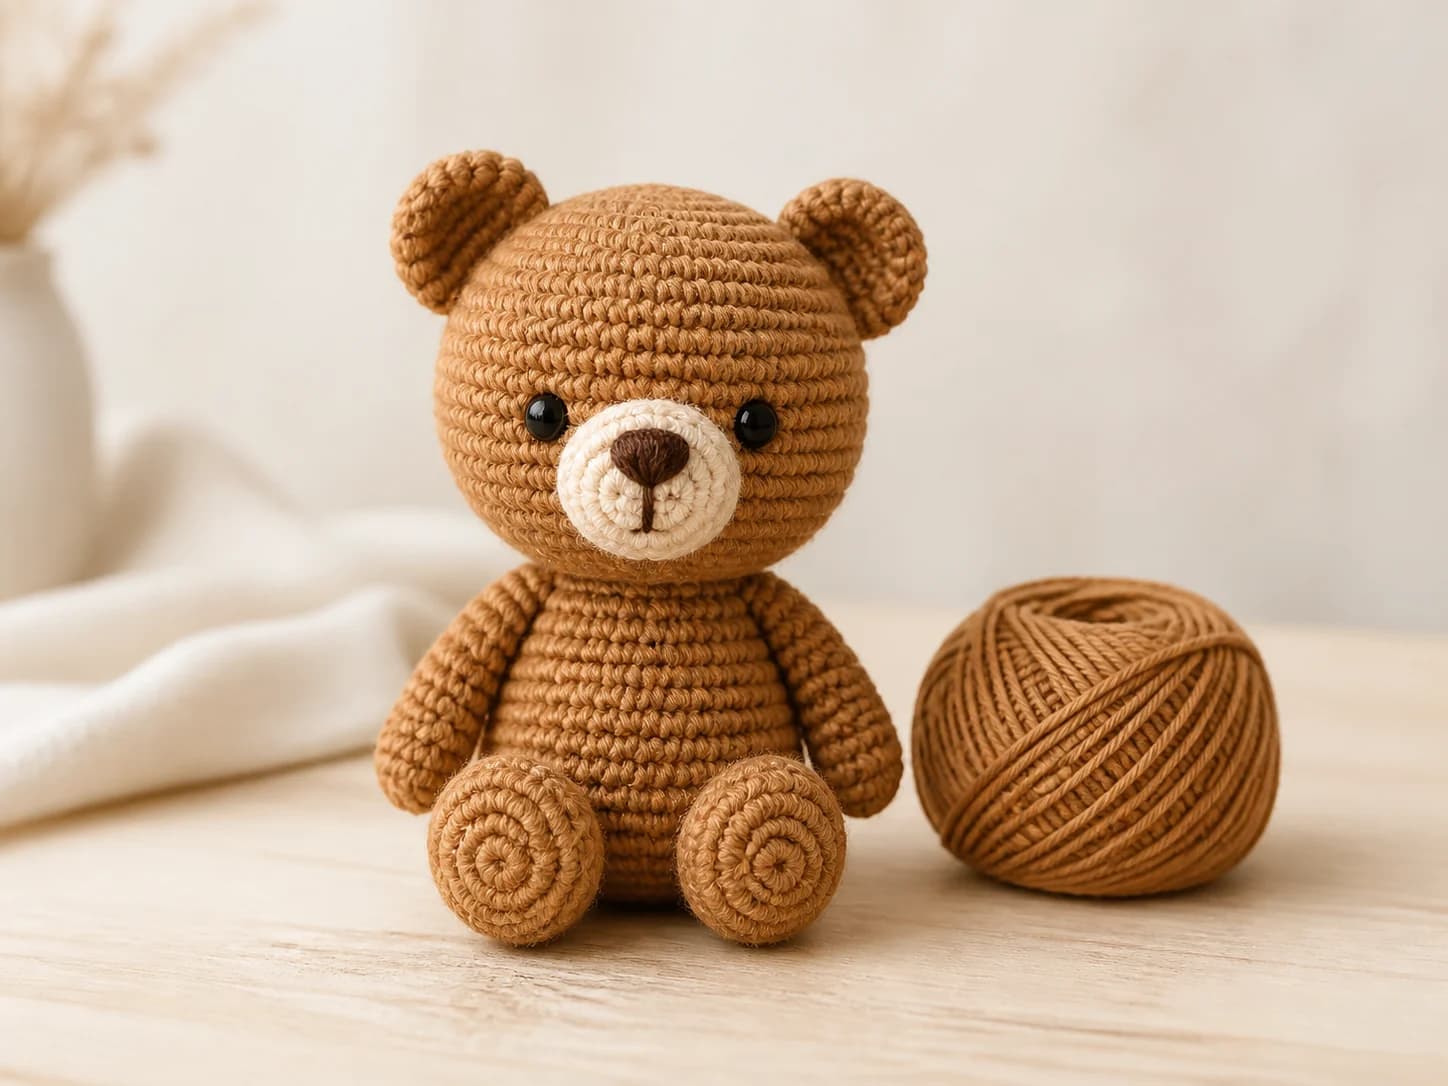
This tiny teddy bear is a compact amigurumi project with a shaped head, contrast muzzle, joined legs and body, flat ears, and lightly stuffed arms. The cotton version finishes at approximately 9.5 cm (3 3/4 in); fuzzy yarn makes a softer bear of approximately 11.5 cm (4 1/2 in).
Pattern at a glance
- Skill level: Intermediate
- Terminology: US crochet terms
- Construction: Continuous spiral rounds
- Techniques: Magic ring, increases, invisible decreases, color changes, stuffing, embroidery, and seaming
Materials
Smooth cotton version
- DK-weight cotton yarn: approximately 17 g main color and 2 g cream or white
- 2.5-3 mm crochet hook
- 6 mm safety eyes, or embroidered eyes
Fuzzy version
- Fuzzy baby yarn: approximately 20 g main color and 5 g cream or white
- 2.75-3.5 mm crochet hook
- 8 mm safety eyes, or embroidered eyes
For either version, you will also need polyester fiberfill, dark embroidery floss, a yarn needle, scissors, and a stitch marker.
Safety note: Safety eyes can be a choking hazard and are not suitable for children under three. Use firmly embroidered features when making the bear for a baby or young child, and inspect seams regularly.
Abbreviations
- st/sts: stitch/stitches
- mr: magic ring
- ch: chain
- sl st: slip stitch
- sc: single crochet
- inc: work 2 sc in the same stitch
- dec: invisible single-crochet decrease
Numbers in parentheses show the stitch count at the end of a round. Repeat instructions inside parentheses the stated number of times.
Before you begin
Work in a continuous spiral unless the instructions say otherwise. Do not join or turn at the end of a round. Mark the first or last stitch and move the marker after every round. Work through both loops unless noted.
Head
With the main color:
- 6 sc in a magic ring. (6)
- Inc in each stitch. (12)
- (Sc 1, inc) 6 times. (18)
- (Inc, sc 2) 6 times. (24)
- (Sc 3, inc) 6 times. (30)
- Sc 6, inc, sc 14, inc, sc 8. (32) 7-8. Sc in each stitch. (32)
- (Sc 7, inc) 4 times. (36) 10-12. Sc in each stitch. (36)
- Sc 1, dec, (sc 4, dec) 5 times, sc 3. (30)
- (Sc 3, dec) 6 times. (24)
- (Dec, sc 2) 6 times. (18)
- (Dec 3 times, sc 1) twice, dec twice. (10)
During Round 10, mark the 17th stitch as the centre of the face. Place the eyes between Rounds 10 and 11 with seven stitches between them. Confirm the position before securing safety-eye washers.
Begin stuffing after Round 13 and add small amounts every few rounds. After Round 16, slip stitch in the next stitch, cut a long sewing tail, fasten off, and finish stuffing firmly.
Muzzle
With the contrast color:
- 6 sc in a magic ring. (6)
- Inc in each stitch. (12)
- Sc in each stitch. (12)
Slip stitch in the next stitch, cut a long sewing tail, and fasten off. Stuff the muzzle lightly but evenly.
Pin the muzzle just below Round 9 of the head. Add a little more stuffing as you sew it in place with small whip stitches. Embroider a compact nose over the centre and add one short vertical stitch for the mouth.
Ears - make two
With the main color:
- 8 sc in a magic ring. (8) 2-3. Sc in each stitch. (8)
Slip stitch in the next stitch, cut a long sewing tail, and fasten off. Do not stuff. Flatten each ear before assembly.
Legs and body
The two legs are made first and joined with a two-chain bridge. The body then continues around both legs.
First two leg rounds
With the main color:
- 6 sc in a magic ring. (6)
- (Inc, sc 1) 3 times. (9)
Right leg
- Sc 3, dec, sc 4. (8)
- Sc in each stitch. (8)
Slip stitch in the next stitch, fasten off, and stuff firmly.
Left leg
- Sc 4, dec, sc 3. (8)
- Sc in each stitch. (8)
Stuff firmly, but leave the yarn attached.
Join and crochet the body
- From the left leg, ch 2. Pick up the right leg and begin in the stitch after its slip stitch: sc 8 around the right leg, sc once more in the first stitch after the chain, sc 2 across the chain, sc once more in the final stitch before the chain, then sc 8 around the left leg. (22)
- Sc 1, inc, sc 4, dec, sc 4, inc, sc 4, dec, sc 3. (22) 3-6. Sc in each stitch. (22)
Work 12 additional sc and move the round marker to this new position.
- (Dec, sc 4, dec, sc 3) twice. (18)
- Sc in each stitch. (18)
- (Sc 2, dec, sc 3, dec) twice. (14)
- Sc in each stitch. (14)
- (Dec, sc 2, dec, sc 1) twice. (10)
Begin stuffing after Round 7 and continue gradually. Slip stitch in the next stitch, fasten off, and finish stuffing.
Arms - make two
With the main color:
- 6 sc in a magic ring. (6) 2-3. Sc in each stitch. (6) 4-7. Sc in each stitch. (6)
- Sc 3, flatten the opening, then work 3 sc through both layers to close it. (3)
Stuff the hand firmly after Round 3, then add only a little stuffing in the lower half of the arm. Leave the upper section light so the arms rest naturally against the body. Cut a long sewing tail and fasten off.
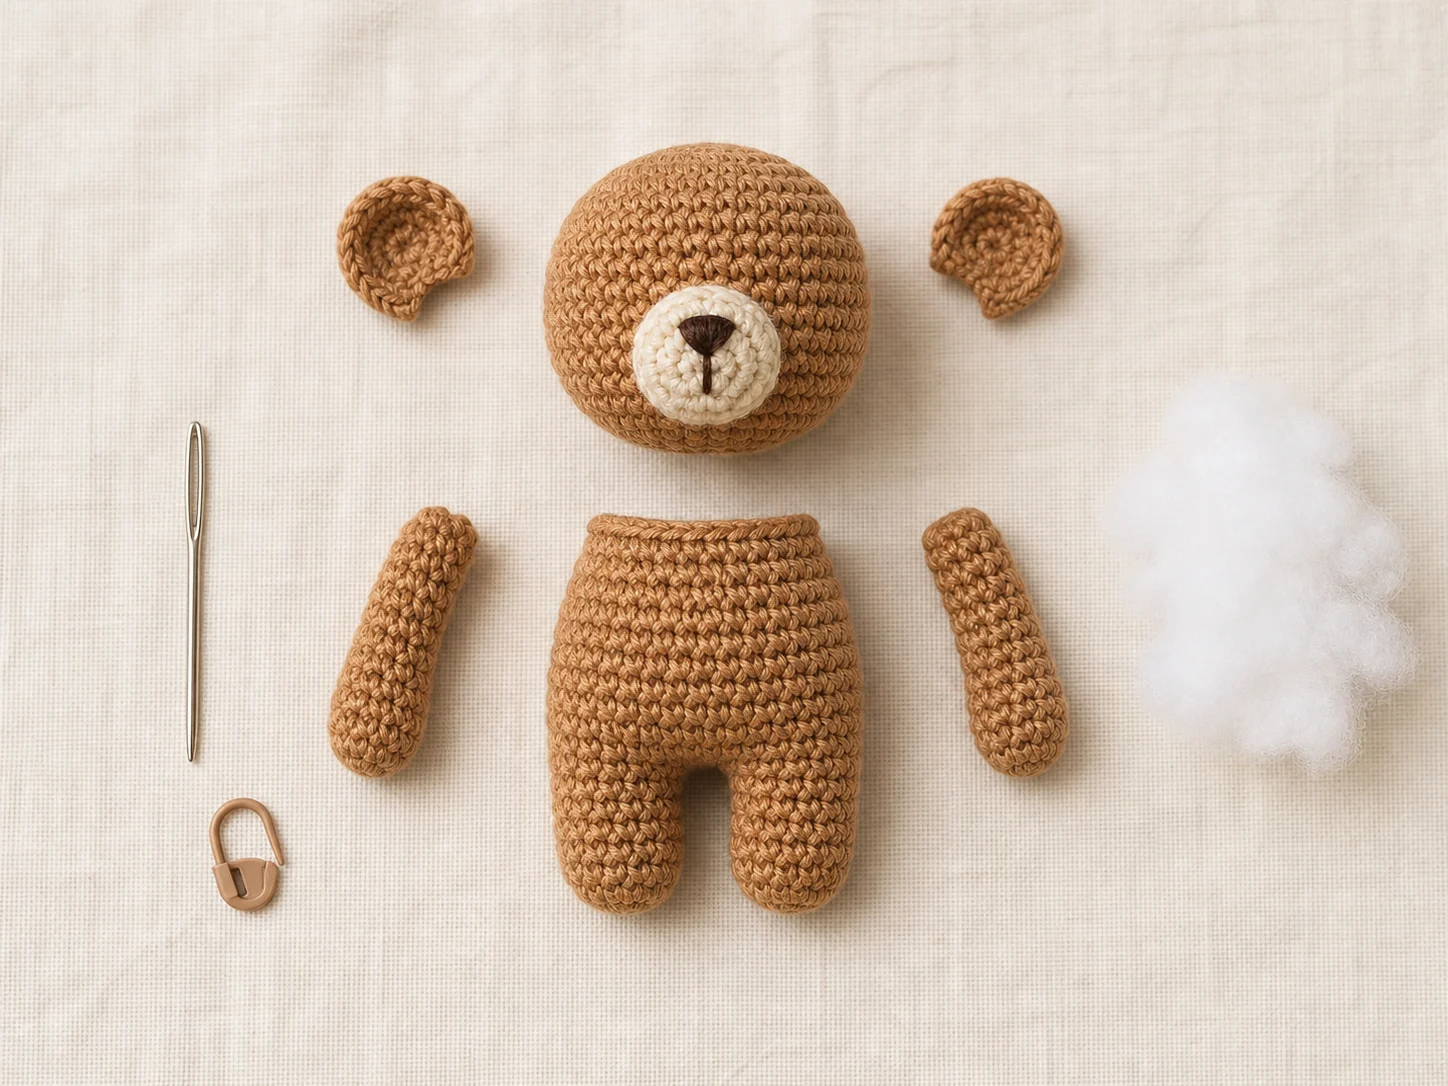
Assembly
Pin every piece before sewing and check the bear from the front, back, and sides.
- Flatten and sew the ears just below Round 4 of the head, stitching through both layers.
- Complete the muzzle and facial embroidery before joining the head. This keeps the facial yarn tails accessible underneath.
- Sew the head firmly to the body. Add a final pinch of stuffing before closing the seam.
- Sew the arms to the sides of the body one round below the head.
A mattress stitch makes a sturdy, nearly invisible head seam. Small whip stitches work well for ears, muzzle, and arms.
Invisible decrease
Insert the hook through the front loop of the next stitch and then through the front loop of the following stitch. Yarn over and draw through both front loops. Yarn over again and draw through the two loops on the hook.
Finishing neatly
Thread each tail onto a yarn needle and pass it through the stuffed piece in two different directions. For extra security, knot the tail around an internal stitch loop before drawing it through the stuffing. Pull gently, trim close to the surface, and allow the cut end to retract inside.
Troubleshooting
Stuffing shows between stitches
Use a slightly smaller hook or loosen the amount of stuffing. The fabric should be dense, but the stuffing should not force the stitches apart.
The bear will not sit evenly
Compare the right- and left-leg shaping, then check that the two-chain bridge is centred. Adjust the stuffing in each leg before closing the body.
The head feels floppy
Add stuffing at the neck before closing the seam and use mattress stitch to create a firm join.
The face looks uneven
Pin the muzzle and mark both eye positions before securing anything. Measure stitch spaces rather than relying only on visual placement.
Quick construction order
- Crochet and stuff the head.
- Make and attach the contrast muzzle; embroider the face.
- Make two unstuffed ears.
- Crochet two legs, join them, and continue into the body.
- Make two lightly stuffed arms.
- Sew ears to head, head to body, and arms to body.
- Secure and hide every yarn tail.