
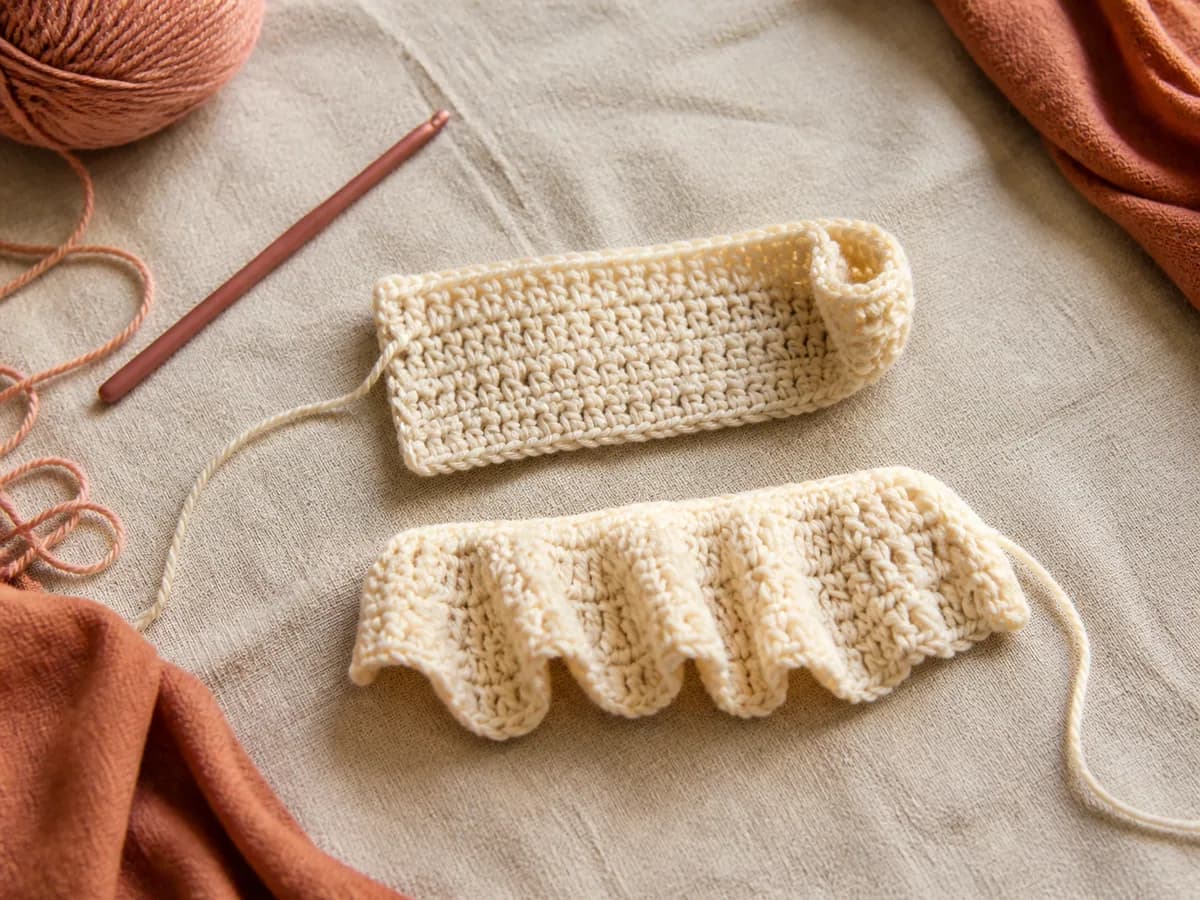
Curling, ruffling and crooked squares look like the same problem — fabric that will not lie flat — but they have opposite causes. One is too few stitches, one is too many, one is a counting error. Find yours below.
Problem 1: the edges curl up or roll under
Almost always the starting chain. A chain is made of loops lying flat, while the stitches worked into it are pulled up and around — so the chain ends up shorter than the row above it, and the bottom edge tightens and rolls.
The three fixes, in order of how well they work:
- Use a foundation row. Foundation single crochet (fsc) or foundation double crochet (fdc) creates the chain and the first row together, at the same tension. The permanent fix, and worth an evening of practice.
- Chain with a larger hook. Go up one or two sizes for the chain only, then switch back for row one. Costs nothing and solves most of it.
- Chain deliberately loosely. Works, but staying consistent over a 130-stitch blanket chain is hard.
If all four sides curl, it is the fabric, not the chain. Uniform curling on every edge means the stitches are too tight for the yarn — a dense, board-like fabric with no give. Go up a hook size. Amigurumi is the one place you want this density, and the one place it does not matter, because stuffing forces the shape.
Problem 2: the edge ruffles and waves
The opposite: too much fabric along the edge for the length it has to cover. Either you added stitches, or — far more often — the border is at fault.
Borders ruffle because row ends and stitch tops are different distances apart, and most people put one border stitch into every available space. Along the top and bottom, one stitch per stitch is correct. Along the sides you are working into row ends, and the right ratio depends on stitch height:
| Body worked in | Border stitches per row end |
|---|---|
| Single crochet | 1 sc per row |
| Half double crochet | About 3 sc for every 2 rows |
| Double crochet | About 2 sc per row |
| Treble crochet | 3 sc per row |
Treat these as starting points and check as you go: work a foot of border, lay the piece flat, look. Waving means too many — skip a row end. Pulling in means too few — add one.
Problem 3: circles that cone or ruffle
A flat circle is pure arithmetic. Each round must add exactly as many stitches as the first round contains, because the circumference grows by a fixed amount each time.
- Start with 6 stitches → add 6 every round: 6, 12, 18, 24, 30…
- Start with 8 → add 8: 8, 16, 24, 32…
- Start with 12 double crochets → add 12 each round.
Add fewer and the circle turns into a bowl, then a cone — exactly what you want for the crown of a hat, and exactly what you do not want for a coaster. Add more and it ruffles like a lettuce leaf.
Also stagger where the increases fall. Stacking them directly above one another every round produces a hexagon rather than a circle; move the increase along by one stitch each round and the corners disappear.
Problem 4: granny squares that are not square
Three usual suspects, easy to tell apart:
- Corners are inconsistent. Every corner needs the same stitch group — typically 3 dc, ch 2, 3 dc. Miss the chain-2 space in one corner and that corner pulls tight, skewing the whole square.
- The square leans like a parallelogram. Classic sign of working continuous rounds without joining, or always turning the same way. Join each round with a slip stitch and turn your work each round; the lean cancels itself out.
- One side is longer. A missed or added stitch group along that side. Count the groups on each side — they must be identical.
Blocking fixes a small crime, not a large one. Wet-blocking will square up a slightly wonky motif and even out tension across a set, which is why joining projects almost always block first. It will not fix a missing stitch group, and on acrylic the effect largely disappears after a wash unless you steam — which is permanent and flattens the texture. Fix the count; block the finish.