
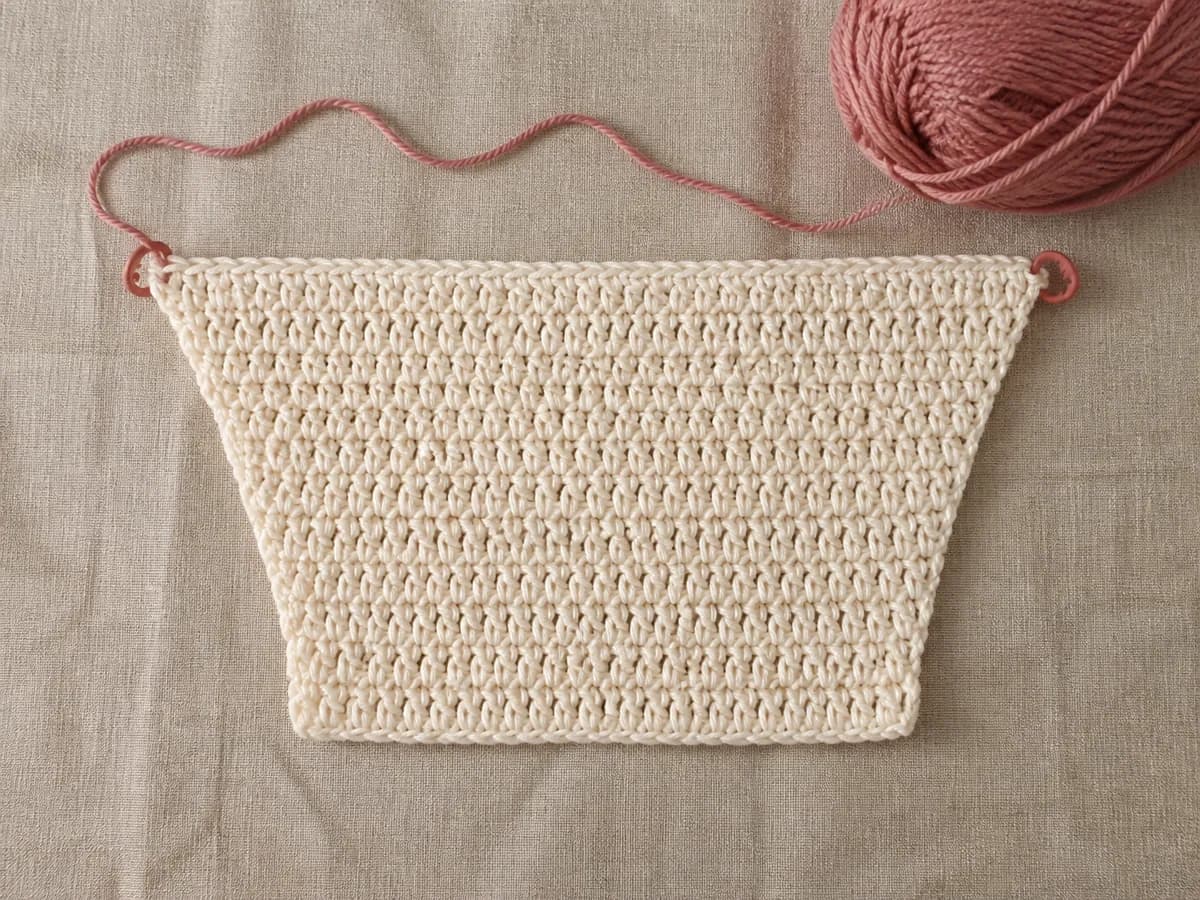
You chained 40, you have been working straight rows, and forty rows later the piece is a trapezoid. This is the most common problem in crochet and it has nothing to do with talent — a stitch is being added or lost at the edge, in the same place, every single row.
There are only four places it can happen. Work through them in order.
Cause 1: the turning chain is counted inconsistently
This causes more wonky edges than the other three combined. At the start of a row you make a turning chain to bring the yarn up to the height of the new row. Whether that chain counts as a stitch depends on the pattern:
- Single crochet — chain 1, and it almost never counts.
- Half double crochet — chain 2, and it may or may not. The pattern must tell you.
- Double crochet — chain 3, and it usually does count.
If the chain counts and you also work a stitch into the first stitch, you gain one every row. If it counts, you skip the first stitch, and you then forget to work into the top of the turning chain at the end of the next row, you lose one.
Pick one interpretation, write it on a sticky note, and apply it for the whole project.
A useful alternative: some crocheters use a shorter turning chain that does not count as a stitch, then work into the first stitch. Only change to this method when you understand the pattern's edge construction, because it can alter shaping, stitch counts, or seaming in a fitted project.
Cause 2: two stitches in the first stitch
After turning, the first stitch of the row sits directly under your turning chain and is easy to miss visually. Crocheters either work into it twice (piece grows) or skip it entirely (piece shrinks).
How to check: after the first stitch of a row, look at where your hook came out. There should be exactly one stitch between your new stitch and the edge — not two, not zero.
Cause 3: the last stitch of the row
The mirror image, and the more common of the two. At the end of a row the final stitch is the top of the previous row's turning chain, which does not look like a normal stitch — it is a chain loop rather than the usual V. It is very easy to work past it, or to stop one short of it.
How to check: the last stitch of every row should sit directly above the last stitch of the row below. If the right edge is slanting, this is almost always the culprit.
Cause 4: nobody is counting
The other three causes are invisible for about six rows, by which point you have to frog a lot of work. Counting turns a forty-row disaster into a one-row correction.
Count at the end of every row for the first ten rows, then every fifth row once the fabric is established. Fifteen seconds, and it is the single habit that separates straight blankets from trapezoids.
Diagnose it in ten seconds
- Both edges slant outward evenly — you are gaining a stitch at each end. Check the first stitch and the last stitch.
- Only the right edge slants (for right-handers) — the end of the row: the turning chain is being worked into, or missed.
- Only the left edge slants — the start of the row: you are treating the first stitch inconsistently.
- Edges straight but the fabric puckers — not a stitch-count problem at all. That is tension, and it usually means the starting chain was worked tighter than the rows.
Fixing a piece already in progress
You do not always have to frog. Count the current row, compare with the pattern's stitch count, and:
- One or two over. Work an invisible decrease at the edge, spread over the next couple of rows, and carry on. Nobody will find it.
- One or two short. Increase at the edge the same way.
- More than three out. Frog back to the last row you know was correct. On a blanket a border can rescue a mildly uneven edge, but it cannot rescue a trapezoid.